

King of the Jungle bunting for a jungle themed baby shower
Who isn’t looking for an inexpensive but modern way to decorate for a baby shower, bridal shower, birthday party, or any celebration? I recently helped a friend decorate for our friend’s baby shower. Instead of store-bought decorations I suggested making bunting. The shower theme was jungle animals so we decided on one string of bunting that said “King of the Jungle” and a few other strings of colorful flags.
Now, there is some debate as to what this bunting is really called. I think bunting is the UK term but garland, flags, or any other moniker means the same thing to me: cute, customizable, and personal decorations for your get-together. I did these out of paper but you could easily make the same type of bunting out of fabric stay stitched around the triangles for the flags.
In this project I used one of my favorite techniques, sewing on paper. This isn’t as scary as it sounds and I have a few helpful hints on this technique at the end of the post.
Supplies needed:
5 to 10 sheets of 12″ x 12″ or 8.5″ x 11″ scrapbook paper (this project is great to get rid of paper scraps!)
Double fold binding tape – 1/4 inch or 1/2 inch finished width
2″ tall alphabet or number stickers, if desired (a Silhouette or Cricut works even better)
Clover Wonderclips (Optional) – really helpful for keeping the flags in place without creating puncture marks
Sewing machine and accessories – needles, scissors, matching thread
Instructions:
1. Cut out Triangles. I used my Silhouette Cameo to cut out larger triangles for my “King of the Jungle” bunting and smaller triangles for the colorful buntings I had planned. I choose the size biased on wanting to get at least 4 flags out of a 12″ x 12″ sheet of scrapbook paper. My large triangles were about 5″ tall and 4″ wide at the top. For the smaller triangles, I made them about 3″ tall and 2″ wide at the top. You’ll have to play with the sizes for your particular party theme, phrase, and decorating requirements.
2. (Optional) Cut out letters or numbers. I used my Silhouette Cameo to cut out my phrase “King of the Jungle” in solid navy in letters about 2″ tall. You could also use store-bought stickers to add your phrase of choice.
3. (Optional) Attach letters or numbers to flags. I attached my letters using double-sided tape, centering each letter 1″ down from top edge of triangle.
4. Sew flags into binding tape. Lay out your flags along the 3 or 4 yards of binding tape. You’ll want to leave at least 12″ on each end to allow for hanging. Trim binding if needed for a shorter string of bunting. Starting at one end of binding tape, stitch along tape about 75% toward the open end, keeping in mind that there will not be flags for the first 12″. When you reach 12″, place the first flag inside the binding tape, making sure the tape is on both sides of the paper triangle and continue stitching. Make sure the triangle is all the way inside the binding and that your stitching is grabbing the flag by at least 1/8 inch (more for wider bindings). Continue stitching across the top of all of the triangle using the spacing you like.
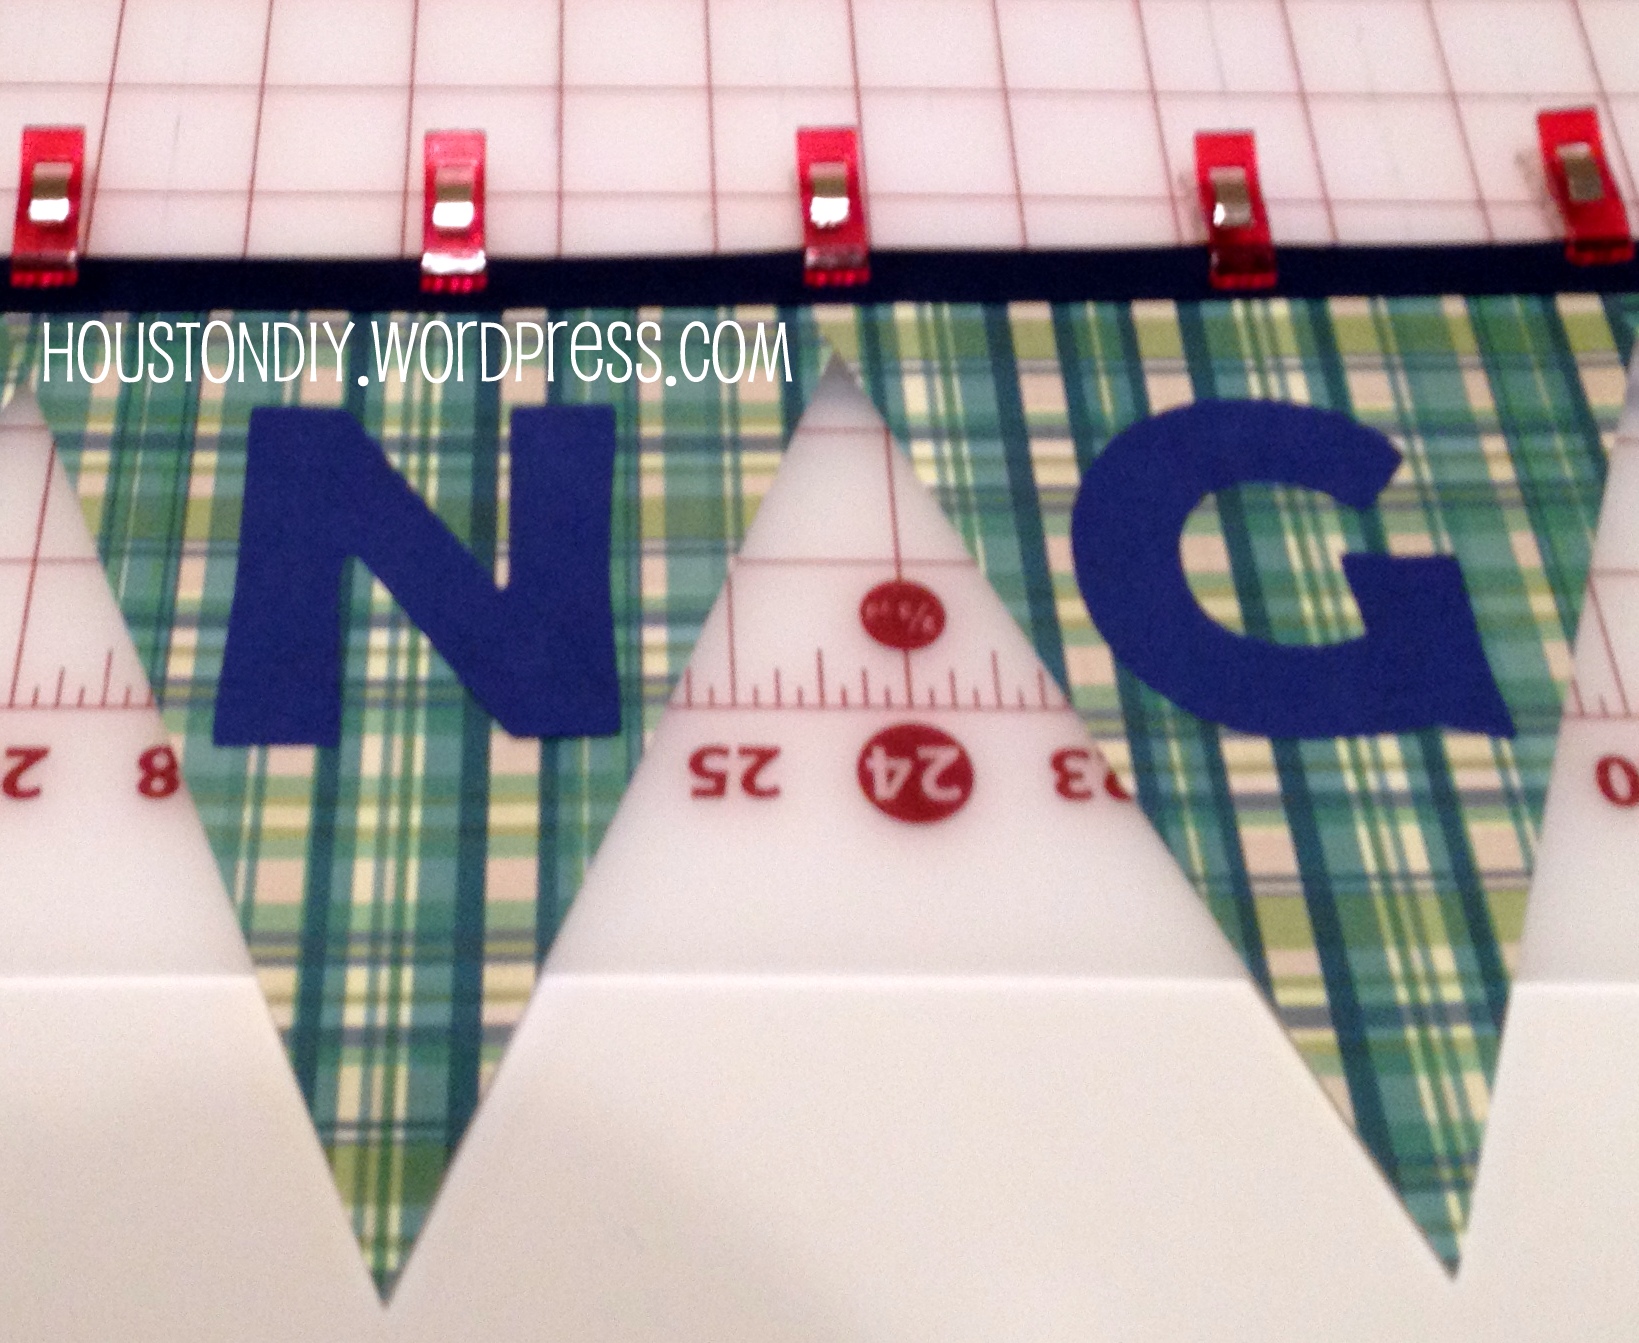
Sewing in my triangles. Clips work great for keeping things in place without the holes left my pins in paper.
5. Pay attention to spacing. Make sure to leave spaces between words. On the “King” bunting, I made sure to reduce the spacing between the letters of a single word and increase the space between words so the phrase was readable rather than one long word. Once you sew on all the triangles in a single seam, your ready to party!

Colorful flags to match the baby shower theme
Recommendations for customization:
– Try making a phrase like “Happy Birthday”, “Congratulations”, or “Happy Anniversary” that you can reuse for various gatherings
– Buy a few sheets of glitter or sparkle paper to add pizzazz to your bunting
– Try making oversized bunting with large triangles and more than one package of bias tape for a bold decoration
Sewing on paper:
If you have never sewed on paper, let me assure you it is very easy and the results looks amazingly professional. There are two important things to keep in mind when sewing paper:
1. It will dull your needle very quickly. You’ll want a thinner needle – a 10 or 12. I have a dedicated sewing machine needle just for paper. If you don’t already, you’ll have one after your first paper project since you will not want to use that needle for fabric again.
2. Use larger stitch sizes. I find a 3.0 or 3.5 works very well. Remember, we are tying to do the opposite of paper piecing where small stitches are used to make sure the paper is perforated and easy to remove. We want ours staying put, so use a larger stitch length ensures you don’t create easy to tear perforations.
– Stephanie, HoustonDIY

Adorable!