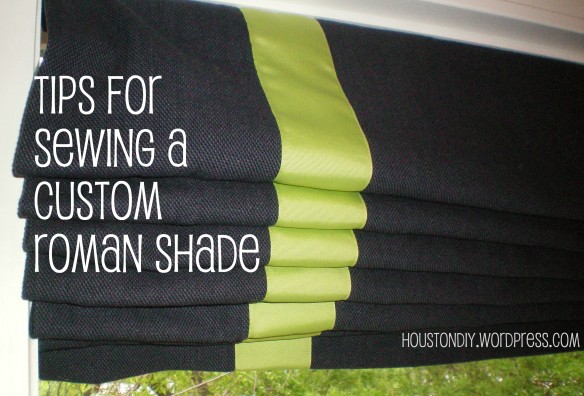
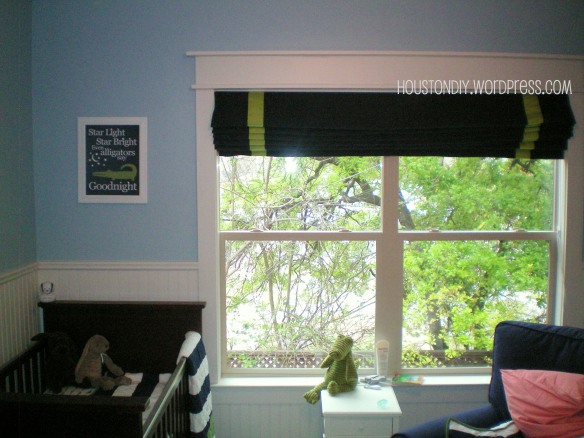
I was recently commissioned (i.e. asked very nicely) to make a custom roman shade for my friends’ new nursery. The job was first planned in the months leading up to the birth and the shade was installed when cute little Ellis was a few weeks old.
The couple wanted a shade in solid navy to complement the room. They looked into ordering one and got quotes of upwards of $800. I knew I could make it with a little Pinterest-ing and sewing time. After some research and fabric shopping, they decided on a navy thick weave upholstery fabric with a 3″ green grosgrain ribbon edge detail. We purchase the navy upholstery fabric and blackout fabric at High Fashion Fabrics, an excellent local Houston decorating fabric emporium and the 3″ grosgrain ribbon from TeaPartyRibbons on Etsy. The remaining supplies were from Home Depot and Joann’s (supply list in reference tutorial post).
Tha main challenge with this project is the size of the window – about 70″ wide x 58″ tall. They wanted it to be all one shade rather than two, which meant that wide width would add some complexity since there would have to be a seam to cover the whole window. After searching for tutorials, I found one that was very helpful. I won’t rephrase those instructions, but comment on modifications I made.
How to Make Custom Roman Shades by Brown Paper Packages
This was the main tutorial I followed. It is a great tutorial and carefully explains what materials you need (tube tape is one of the best crafting inventions ever! Never roman shade without it! I’m not kidding, ring tape is sooooo 1990s). She has very clear instructions on how to space your tube tape and drapery cord lines to make sure everything is well supported and a great materials list with formulas for calculating what you need to purchase – drapery cord, tube tape, lining, wood for mounting, etc.
I followed Brown Paper Packages’ instructions for the most part. I had to make some changes due to my width and I changed the side edges. Since we were adding the edge detail with the green ribbon, I created the front navy piece from three panels and hid the seams under the ribbon. For the blackout fabric, I made a vertical seam in the center. Offsetting the seams in the front and blackout panels also helped reduce fabric bulk when it was hung.
I followed the advice from another blog post (I’m bummed I can’t find the reference!) for the edges. I wanted the navy to wrap around the edge for a more finished look. I measured my panels so the navy wrapped 2″ onto the back. The technique is to create the front panel 4 inches wider and the lining 4 inches thinner than the finished width. Then, stitch them together along each side at the appropriate point in the process. This creates a 2 inch wrap around of the front fabric.
The ribbon embellishment created additional complexity. I wanted to sew over the grosgrain ribbon as little as possible while achieving a finished look – that is, as little visible sewing as possible. It required additional hand sewing, but I think it was worth it. Here is a summary of the steps I took for assembly that differed slightly from the referenced tutorial to eliminate the need to sew over the ribbon.
Assembly Steps:
1. Assemble blackout fabric lining panel (vertical seam in middle of panel) and hem bottom edge. I used a 1″ seam.
2. Assemble front panel from three pieces of fabric with two vertical seams where you want the ribbon to be. The outer edge of my ribbons are about 8″ from the finished edge. For a thinner window, you would likely have them closer to the edge.
3. Sew on the two vertical pieces of ribbon over the seams. I sewed an 1/8″ seam on each edge of the ribbon.
4. Hem the bottom edge of the front panel, switching thread colors when sewing over the ribbon. I sewed with navy thread in the three sections of fabric and then switched to green thread to sew over the ribbons. I sewed a 2″ hem to correspond with the 2″ overlap the navy will have in the sides. (Note: this is the only visible time I sew over the ribbon in this project. I sew over it in step 7 with the horizontal ribbon)
5. Sew front and lining/blackout panels together on both sides with right sides together. I positioned the blackout panel about 2″ about above the front section to match the 2″ overlap in the sides. Flip right sides out. (Because of the size of this shade, I double checked all my measurements at this point)
6. Flatten the shade so the navy overlap on each side is equal at 2″ wide. I sewed down the length of each side about 1″ from the edge to keep everything together. I only did this step because the thick weave upholstery fabric completely hid my stitches. I wouldn’t recommend this on other fabrics that will show stitching unless you want that seam visible. You could also hand or machine baste the sides at this point. I felt it was helpful to steady the piece for the next steps.
7. Based on where I knew my lowest tube tape would be positioned, about 6 inches above the bottom hem, I was able to attach the horizontal ribbon to the shade, sewing through both layers. Depending in your spacing and shade dimensions, you may need to sew on the tube tape first or slightly adjust the position of the tube tape near where you want to sew on any ribbon embellishment.
8. Next, I followed Brown Paper Packages’ instructions in sewing on the tube tape. I sewed from the back (top thread white, bobbin in navy), but the big difference for me was that I did not sew over the ribbon embellishment. While pinning each length of tube tape, I also pinned to indicate the edges of the ribbon and did not sew over them.
9. Another difference was the edges since I wanted the navy overlap. I left about 1 inch of tube tape at each end. My shade had 6 rows of tube tape to cover the 58″ height.
9. Because of my desire to not to sew over the ribbon, I now had some hand sewing to do. I hand tacked the end of each tube tape row by tuning under about 0.5 inches and sewing it down with a hidden stitch. The tape ended about 0.25 to 0.5 inches from the edge of the shade. I also hand tacked the two edges of the horizontal ribbon. I folded a bit under to match the edge where eye navy stopped, 2″ in from the edge.
10. At this point I went back to following Brown Paper Packages’ tutorial for adding the drapery cord (I had 8 cords for my width!), covering the top wood piece with navy fabric, adding eyelet screws, and mounting it in the window. Instead of the Velcro that Brown Paper Packages’ used, installed the shade to the top wood piece and mounted it directly to the window frame. After hanging we inserted 3/8″ diameter wooden dowels in the tube tape to get crisp pleats. This is a must unless you have a very thin shade and so easy with the tube tape.
Overall, the project turned out pretty well. The navy fabric stretched a bit at the top because of the thick open weave, but it was able to be installed pretty well.
One word of warning when working with blackout fabric – it is not self healing. Because of the plastic layers used to create an opaque fabric, the fabric does not heal after being punctured with a needle. Therefore, take your time when sewing it since ripping out stitches will leave small holes through which light can pass. This was an issue in this project because the navy fabric had such an open weave. When the shade was hung and the bright sun was outside the window, I could see each seam of the tube tape across the shade. It’s probably something only a DIYer would notice, but worth mentioning.
-Stephanie, HoustonDIY


